Monday, July 23, 2012

Holiday Crafting

 I couple of weeks ago my friends and I got together to make this found on none other than Pinterest. So when I went back to Utah I made something similar with my mom. It's super easy, cheap and turned out really well too.
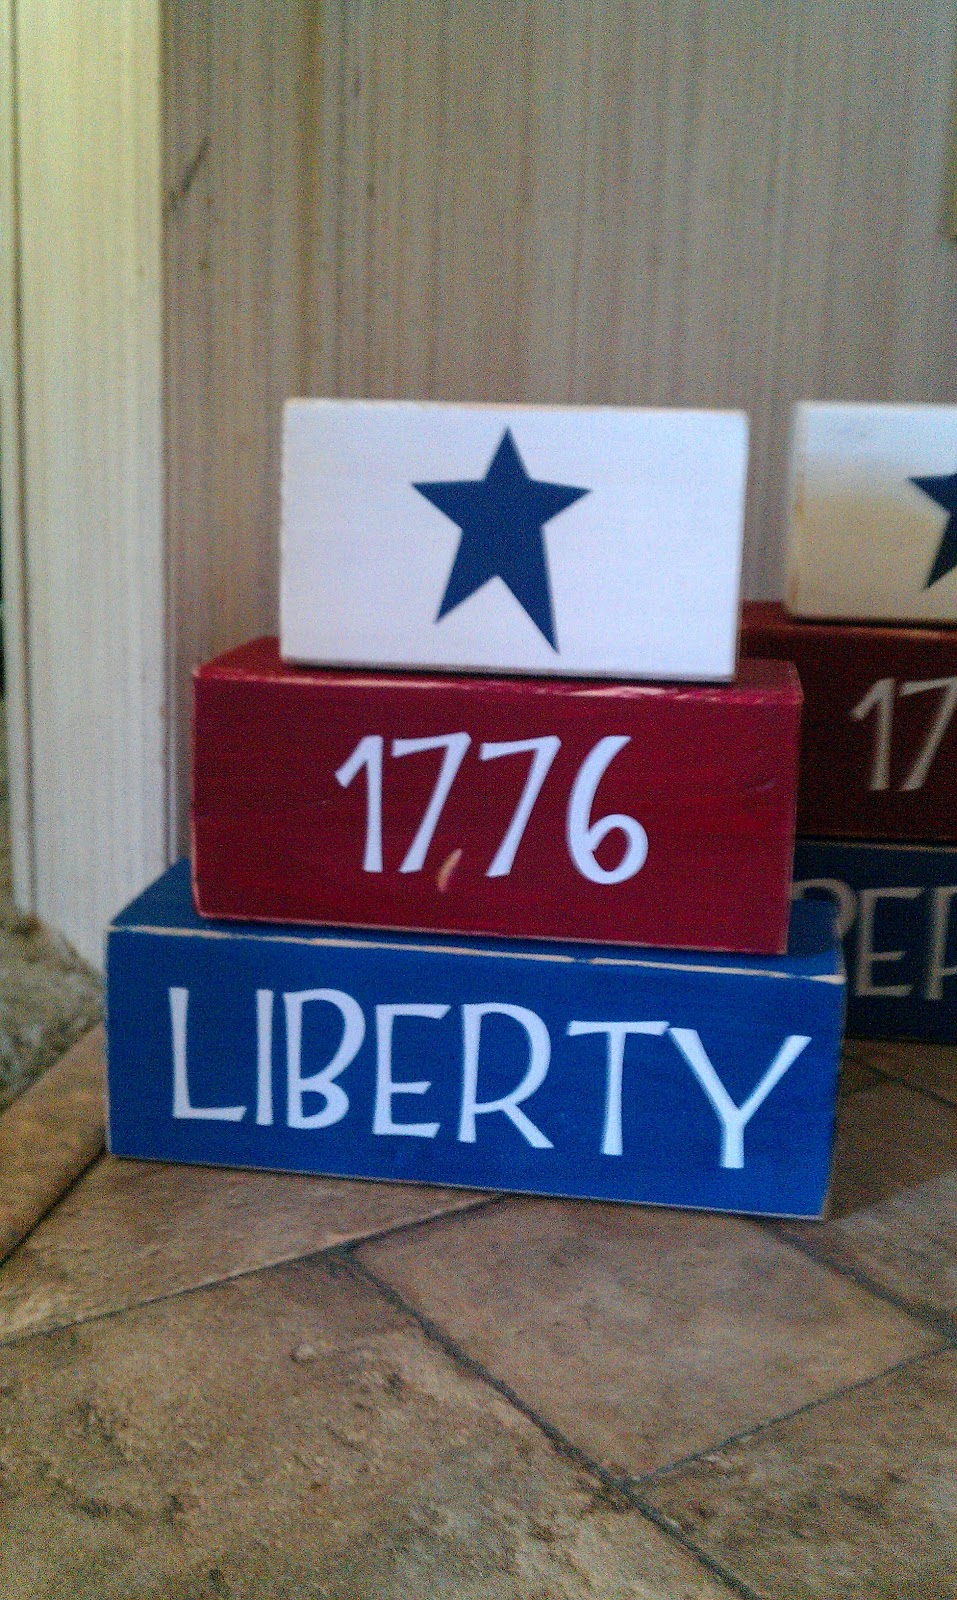
 We bought a 4x4 at a hardware store for around $8 and had them cut 2 at 12", 2 at 10" and 2 at 8". Sanded and painted then added White vinyl cut with the Cricut machine at 1.5". I decided to take the craft from the link above and make it my own so I cut out a star from scrapbook paper using the Cricut and ModPodged it on. We made one for my mom and one for Makenna. I mine at home already.
 Since the 4x4 came in 8' pieces we had a ton left over, so we cut these. I think they are 9" and 7" in length. I like that each one turned out a little differently.
 Mom wanted crazy letters.
 We made Mak's just simple and cute.
The only difference in mine is capital letters.
We sure had fun making these together. Thanks mom for a great time and letting me make a mess of your kitchen table.

Sunday, July 22, 2012

Jane's Little White Dress

 I am so happy how Miss Jane's dress turned out. I knew when she was born that I wanted to make her blessing dress. At first I wanted to make it out of my wedding dress, but when I pulled out my dress to see what I could do with it I could part with cutting it up. I guess I'm a little partial to it. 
 A baby blessing in the Church of Jesus Christ of Latter Day Saints is essentially a prayer that asks God to watch over the child while on this Earth. It is not necessary, but is an opportunity to receive blessing from our Heavenly Father.
 I really enjoyed making this dress for my sweet baby. I am not an avid sewer so it was pretty simple. I knew what I wanted it to look like. Although next time I would add a few more decorative elements to the dress. Unfortunately I do not have pictures of me making this dress, but I do have links to tutorials that I found as I was sewing and was not able to figure things out on my own. No I did not use a pattern which made it even more fun to make.
The fabric is just a simple cotton I found at the local store. I bought one yard with a pattern and another yard just plain white. My idea for the bodice came from looking at some of my dresses. I did not want to see any of the seems so I used this tutorial from Make it and Love it.
  
I managed to make it through the bodice and part of the sleeves with out any of the seems showing. The tutorial showed how to make the sleeves have no seem but I wanted my sleeve done a little differently. Unfortunately I cant find the exact picture I got the idea from but It looks something like the sleeve from Sew a Fine Seam.
Then I made a simple skirt part by sewing the material into two tubes and base stitched and scrunched them up similar to Make it and love it. I added a few buttons up the back and ribbon for extra detail. 
Most of my ideas came from this dress I found at Homemade By Jill, here, here, and here.
I really liked the way it turned out. I had a lot of making it and definitely learned a lot.

Thursday, June 14, 2012

Guest Craft: YW Camp Chore Chart

I am so happy that we have a guest crafter today, and just in time too. Young Women girls camps are coming up fast.
Our MOM is the guest today! She is one of the girls camp directors for the Spanish branch in her stake. She has been helping them out for several years now. She is not that new to girls camp though. I know she has been going to girls camp for her stake for 20+ years now. In our family we love to go camping. It is something we all look forward to doing all year. We've become quite good at it.
Since she has had some experience camping she knows the in and outs of getting things done and adding some fun with it. 
This year for camp she made a job chart for the girls. That way each girl will know what to help with for meals to make things run smoothly for the week. This is the awesome chart she came up with. 
 Isn't she creative?!
Each person going to camp has a bear bookmark with their name on it. She even put their initials on the bear paws. Each meal a girl has a chore. The chores are marked by an envelope that the bookmarks are placed in. Wash, start fire, help cook, rinse, dry, clear table, and free time are the jobs that need to get done.
This is such a great idea. On the back of the poster she has the descriptions of what needs to be done at each station. That way the girls will know exactly what they need to do. 
My sister and I have loved going to girls camp and it was always so great to have our mom be there with us every year. I know that the girls in mom's stake are so lucky to have her. 
Thanks for sharing your awesome idea with us.

Tuesday, June 12, 2012

Mini Scriptures

I teach a primary class of young kids for my church. A few weeks ago we had a lesson about the prophet Joseph Smith translating the gold plates into the Book of Mormon. For a cute handout I found this miniature scripture idea for the kids to take home.
My philosophy is that I get ideas for other people and then figure out how to do it on my own so that it is somewhat my own. I'll tell you how I did it.
What you will need. 
tape
glue stick
card stock
"Hershey's Treasures" candy
ribbon
print out of your scripture.
Cut the card stock so that it fits both chocolate pieces and tape them down on the paper. I think it was about 2 1/2 X 1 1/2. I'm not positive though. (I made them a while ago).
Use the glue stick to glue the small piece of ribbon to the chocolates. It should stay pretty tight but if not it's ok because you'll put your scripture on top.
Print out your scripture in a very small font into two narrow columns. You may have to work around with the document to make it work. I chose the scripture Doctrine and Covenants 3:19. Because that is where we learn that the plates of old were meant for us to read and study now.
Stick the scripture on with the glue stick and you're done. 
Not including the time I spent fiddling with the word document, this project took about an hour. Next time I do this it will be for kids who are a bit older that will appreciate the thought instead of just devouring the candy as soon as they saw it.

JUSTINE

Saturday, May 19, 2012

Baby Rees


Second attempt at new born photos. This little one belongs to me so I was able to take a lot of photos. 


This one was for my hubby!


We love our little guy!


Friday, May 18, 2012

Mothers Day 2012

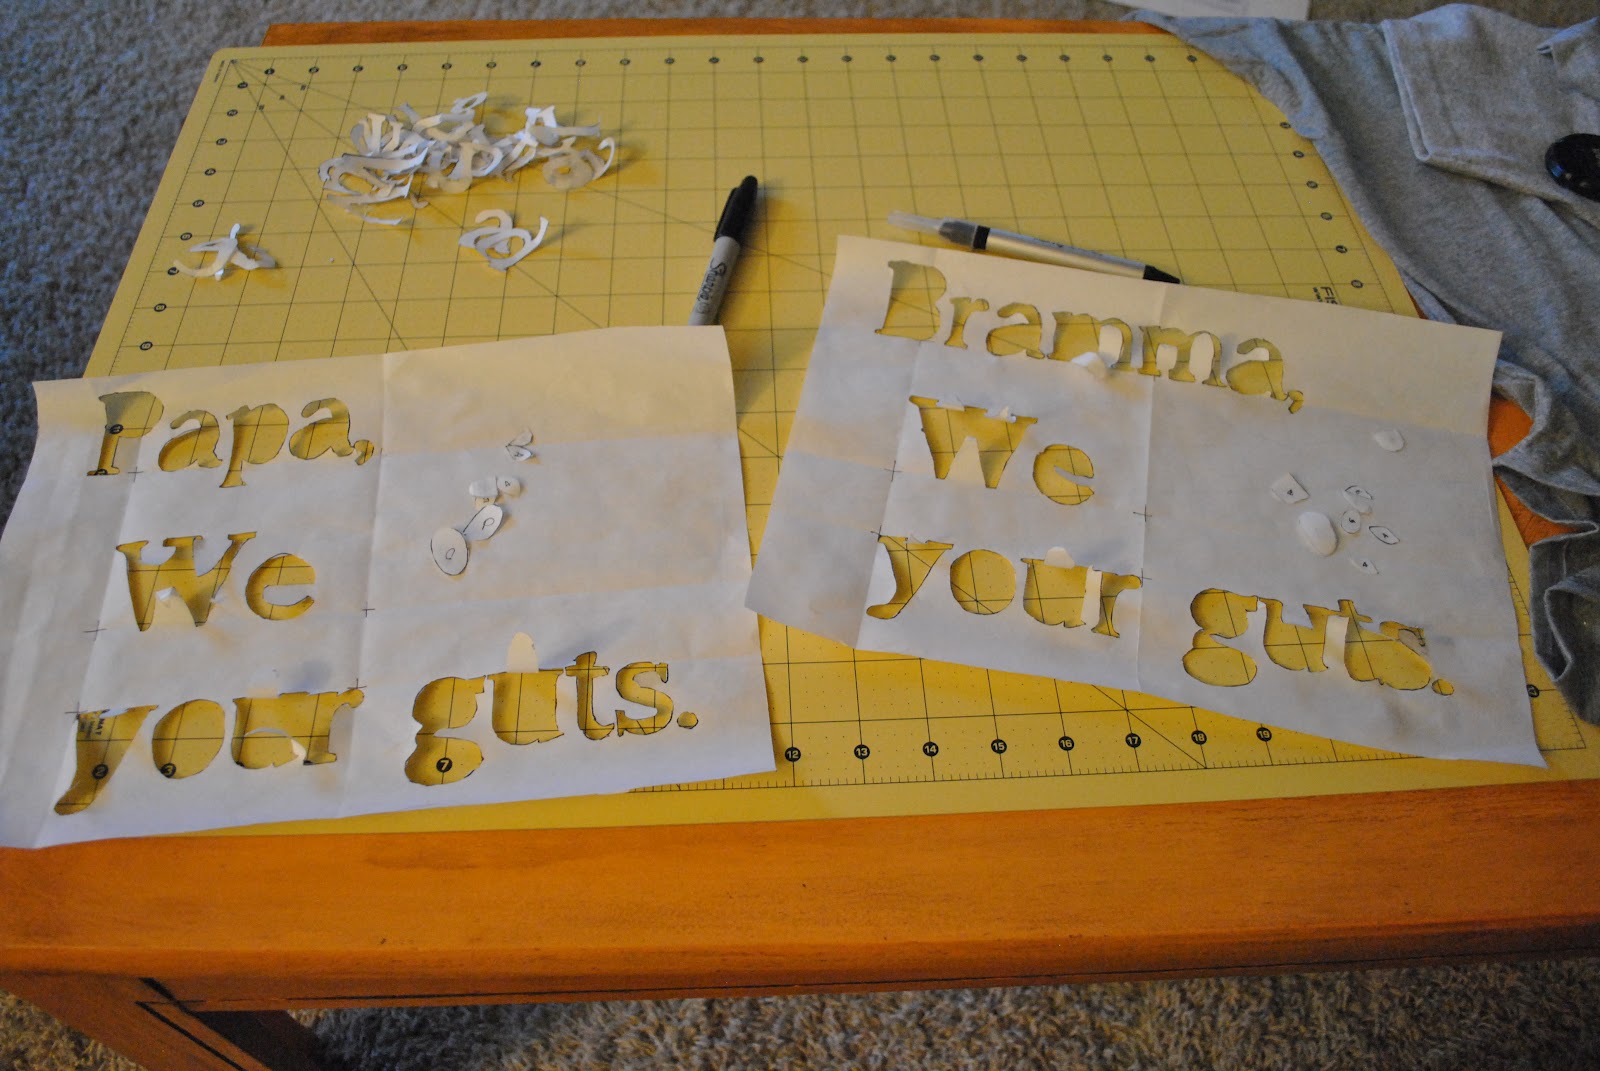
Each year for Mother's and Father's Day Makenna makes a shirt for our mom and dad. This year we decided to have all three grandkids pitch in for the shirt. The shirt usually has a hand or foot print on it with a cute little saying. While living with Grandma and Grandpa A would tell Bramma and Papa "Good Night, I love your guts" so that's what we put on our shirts.
This year to make it easy on us we used a tutorial for painting the shirts with freezer paper from this website one little minute. In case you don't want to head on over there I'll tell you how I did it here.

What you'll need:
Print out of cute font
Freezer paper (wax paper is not the same thing)
x-acto knife
t-shirt
iron
pen
paint
foam brush


Print out the saying, it doesn't have to be any special paper just printer paper will do. I chose a cute font that I liked called "A Song for Jennifer" and made it large enough for it to be seen on the shirt.
Measure your freezer paper for the shirt. I folded the paper so that the words would be lined up correctly on the shirt.


Trace the font onto the freezer paper. Line it up so that all the words line up and aren't slanted at all.

Now, use your x-acto knife to cut out the letters from the freezer paper. The x-acto knife makes it easy to cut the little spaces. Remember to keep the inside of letters such as the A, E, G and O. Tip: I used my cutting mat for this so that I didn't cut into anything I would regret later.

This is the easy part, iron. Place the freezer paper on the T and line it up where you would like the words to be. It sticks really quickly and super easy to remove when the paint has dried.
Now paint it! We used Tulip Puff paint for the saying and brushed it around with the foam brush. Make sure that all of the freezer paper is ironed securely or the paint may get under the paper.
Let the paint dry for at least an hour or until it is not sticky any longer. Pull the paper off the shirt, and there you have it.
We started with the hand prints with little J in Nebraska, then sent the shirt to Utah to finish it up with A and R's handprint. The little ones were difficult to get because didn't necessarily like to open up their fists. The paint we used for the prints was just normal craft paint.
A beautiful Mother's Day gift from the grandkids.
Past years shirts can be found at these links. Makenna is such a creative gal. Just one of the many reasons we love her.

Friday, April 13, 2012

Baby Jane

This was my first attempt at New Born photos. I really enjoyed taking them! 


She is such a good baby! I am not sure New Born Photography is my thing it requires a lot of patience but I did love taking these of my new Niece!