Showing posts with label fabric. Show all posts

Wednesday, February 6, 2013

Easy Baby Blankets

These are some fun easy blankets!
They are so basic that if you don't know a lot about sewing (like me) this will be a good project. You could also use this to teach younger crafters!
I used: 
Two pieces of flannel. (I just got enough material to make them square)
Sewing machine.
First put your pieces for material front to front. Make sure they are the same size. Then sew around the edge stay close to the edge. Leave a section open to turn your blanket right side out. 

Once you have turned it right side out iron the blanket around the edges to that it will be easy to sew again. Sew around the edges and close the section that you left open. 

 You could be done if you wanted I sewed around one more time for looks. :)


You can find some fun flannel and make some super cute combinations!
You could also make them smaller for baby blankets for your little ones babies. Your Kid and her baby could have matching blankets!


Wednesday, March 21, 2012

Temple in Every Room

To you parents of young children, may I share with you some sage advice from President Spencer W. Kimball. Said he: “It would be a fine thing if … parents would have in every bedroom in their house a picture of the temple so [their children] from the time [they are] infant[s] could look at the picture every day [until] it becomes a part of [their lives]. When [they reach] the age that [they need] to make [the] very important decision [concerning going to the temple], it will have already been made.”6 


From President Thomas S. Monson's talk The Holy Temple- A Beacon to the World


We've been told to have a picture of the temple in every room in our house. We have one that I really enjoy. 


My husband and I were married in the Jordan River Temple about three and  half years ago. I was given a plaque with this metal piece of the Jordan River Temple. I liked it a lot but the wood board that it was on did not quite go with my house decor. It was purple. So I took the temple off and placed it in this frame with some scrap material I had. 
I love it because it is something that I created and I can change the background to fit any room in my house. I love to create new things plus it's great to actually have it hanging in our house.


Saturday, March 17, 2012

Woodland Mobile

 Before my sister made me the invites for my baby shower I knew I wanted a woodland theme for our little girls' room. We got a play pen with a bassinet for her to sleep in until we get a crib or another bed and this one came with a mobile. There were little white bears on it that I did not like. So, yesterday I took the time and made these cute little felt animals for it.
 They are just made from felt and I added little embellishments, stuffed 'em with for fluff left over from making a pillow and blanket stitched them up. It was fun and easy to make.
Look how cute they are hanging over the play pen! We can't wait until she's here.

Thursday, March 15, 2012

Bunting for Baby

It's been a while since I have posted anything. I have a few projects that I have done and that I have in mind to create. I am way excited about this one. It going to go in our little baby room, it will be the first decoration we put in there. Bunting is getting pretty popular these days. People are using it to spruce up just about anything. There are a ton of different ways to do it, but this is how I did mine.

What you will need:
Sewing machine or needle and thread
At least 3 different patterns of fabric
Bias tape
cardstock 
ruler
scissors

Cut out a pattern for your triangles, I made mine from cardstock. Cut it out the size you want your bunting and add 1/2 inch for seam allowance. I measured mine 15 cm top, 21 cm down the center. Mark paper in the middle measure 7 1/2 cm from center to both sides and connect together 21 cm from top. Easy as that!
 Fold your fabric right sides together. Mark your pattern on the wrong side of the fabric.
I wanted to do three of each patterns that I chose for this project. Mark all three together to save time and fabric. Pin triangles in the middle before cutting.

Sew along the long edge leaving about 1/4 inch seam allowance. When you get to the point keep the needle down and turn material. Then sew up the other long edge leaving the top open. To save thread and time, there is no need to cut the thread between each one. just sew a couple of extra stitches and add the next triangle. Follow the same steps for all of them.
After all the long sides have been sewn, trim the tip of the point so that it's not bulky when you turn it. Cut thread that was left between the triangles. Turn all triangles right sides out. Use a pencil to make sure the tip comes to a point when turning all triangles.
 Now they are ready to be ironed. I used the cardstock from before to keep the seams tight when ironing. Just stick the cardstock in the "pocket" and iron out those wrinkles.
When they are all ironed put your bunting in the order you want it to be in. Keep them in the order so it's easier when you're sewing.
Add the bias tape to the top edge of the bunting. I didn't have any bias tape so I made my own from some fabric I had at home. Sew about 10 cm of bias tape together before adding the first triangle so you have enough to fold over to hang it up. Add each triangle between the bias tape and sew using a 1/4 inch seam allowance. Before adding each triangle make sure you space them apart. I used the edge of the metal piece (I don't know all sewing machine terms). I finished each triangle and added the next one at the edge of the metal piece and sewed along the bias until the triangle came up.
Once all of the Triangles have been sewn of the bias tape leave another 10 cm to the end. Fold back the bias tape and sew back and forth to secure it to the bunting, and you've got a perfect loop for hanging it up!

It has been so fun to make this. I hope you enjoy this tutorial. Please leave a comment if you don't understand any of the steps.

Wednesday, November 2, 2011

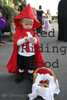
Little Red Riding Hood

This was my little girls halloween costume this year.
Here is what I did:
I took a yard of material and cut so that it would be a good length for my daughter.  

Then I took the left over material and cut a square to make the hood. 

Once I had it all cut out I surged the side of the cape and left the top and bottom un-surged.

Then I sewed across the top with the large strait stitch. I found the middle and pulled the stitch I just made so that it looked ruffled. pinned this in place and sewed it in place. Then I surged over that.
For the hood I surged the sides of the hood and then added to my cape and surged them together. I then took the top and folded it in half to surge it together.  

I then added ties to the area where I sewed the hood on.  


This is how it turned out. My riding hood can also be used as a cape I just tuck the hood and its a super hero cape.


Thursday, August 18, 2011

Camera Strap

Sewing is not one of my strong suits, I don't do it very often and when I do I am using my thread ripper more than the actual sewing machine. BUT the other day I found this tutorial and Lori explained how to make this camera strap cover so well, that I decided to try it.  
I liked it because it had a little pocket for my lens cap.


Don't look to close because it is not perfect but it was very easy to make. I added a diagonal line so that the cover would stay in place. 

DIY under $5


Creations by Kara


Thursday, July 28, 2011

Warm Fuzzy Bag

I love to camp!! But sometimes I get so cold at night, then I remembered something that I was given when I was younger. Some awesome leaders that I had gave me a bag with a bottle in it that we would  fill up with hot water and put it at the bottom of our sleeping bag and it would keep us warm all night long!
So I decided to make some for my self and for the other craft leaders who worked with me at girls camp.

This is what I did... 
I got some fleece

and some medical bottles

I cut the fleece into 10x13 inch pieces and folded them in half the long way

I surged the two sides

Then folded over the top and sewed it to make a place for the string to go.


I cut two cuts into the tube for the string to go into and tie at.


 So you just put hot water in your bottle and put it at the bottom of your sleeping bag and the fleece keeps it warm longer.

When I gave it to the women at camp I had a little description tag with it that said

"There once was a village that was full of kindness love and compassion. Each member of the village owned a special bag filled with warm fuzzies. The people in the village gave each other warm fuzzies any time the wanted to let someone know they were loved. This is my warm fuzzy to you to let you know that you are loved.
Fill your bottle with warm water and put it in your warm fuzzy bag at the bottom of your sleeping bag. As you are warm in your bed, think of way you can let others know they are loved too."

I got the idea from this blog. 

Sunday, May 22, 2011

Girls Camp Bucket

Girls Camp Craft #3 is this fun bucket.
 As a youth at camp we made these and I loved mine I brought it to camp every year, I would but my camp journal, scriptures, camp manual, and candy in my bucket! This could be used not just for camp but any time you need to carry stuff with you and have a seat.
I got my bucket at Wal-mart for around three dollars 
If you are going to glue your cushion on you will need about a quarter of a yard of material. You can also sew a cushion, if you do this you will need a little more material.
You will need hot glue, filling and a marker also. 

I just took my lid started glueing on one side and add your padding in as you glue. 

Just add your details to your bucket and you are ready to go.
any size bucket will do and you can get them many different places, I got my first one from a hardware store they were getting ride of it. 


Tuesday, May 10, 2011

Mothers Day 2011

This is what decided to make for Mothers Day 2011! Athena, Clay and I made them for grandparents we hope they love them!
 What I did: 
I got my shirts at Wal-mart for $5.
I printed the letters onto paper using Courier font. Then I had some black puff paint and copied the letters from the paper and smoothed out the paint using a q-tip. Red pastel paint for the hand prints. 
I made the same for grandmas and grandpa!
Happy Mothers Day!!