Wednesday, November 2, 2011

Little Red Riding Hood

This was my little girls halloween costume this year.
Here is what I did:
I took a yard of material and cut so that it would be a good length for my daughter.  

Then I took the left over material and cut a square to make the hood. 

Once I had it all cut out I surged the side of the cape and left the top and bottom un-surged.

Then I sewed across the top with the large strait stitch. I found the middle and pulled the stitch I just made so that it looked ruffled. pinned this in place and sewed it in place. Then I surged over that.
For the hood I surged the sides of the hood and then added to my cape and surged them together. I then took the top and folded it in half to surge it together.  

I then added ties to the area where I sewed the hood on.  


This is how it turned out. My riding hood can also be used as a cape I just tuck the hood and its a super hero cape.




Costumes!

This year for Halloween my husband and I were Mary Poppins and Bert, the chimney sweep.
For his costume we needed a chimney sweep obviously. Luckily it was easy and FREE!
I started out with two cardboard boxes, and cut three circles out of them.

I taped up the folds so that I would be a bit more stable when I cut into them.

The next step was to cut around the edge to make it look like the bristles of the broom/sweep.
Then I punched a whole in the center with the broom handle that it will go on, so that the whole is about the same size.

The next step was to spray paint it. I happened to have black spray paint at my house. After the paint dries stick all three on a broom handle (that you have previously taken off the broom on.) and fray the edges that have been cut.
Super easy!!

My next project was the shirt for Mary Poppins. I found a Tuxedo shirt at the thrift store for $1.50!! It was a bit masculine so I thought I would work on  it a bit.
It started out looking something like this.
I was able to take in the sides of the shirt to fit and take off the large sleeves and ruffle the shoulders with the bulk of the fabric.
I also customized the detail on the front of the shirt.

I lowered the detail and added a bow as well as a fringed the collar. What you cannot see the bottom of the tuxedo detail is in the shape of a "V" for a more feminine look.

It turned out to be a success. (Not the photograph, the costumes and our Halloween).

Tuesday, November 1, 2011

Chicken Parmigiana

This week for Tuesday Treats I made a delicious quick meal. 

Chicken Parmigiana
My photography is not good,  I promise it looked a lot better than it looks in this photo. It tasted wonderful too.

You'll need:
1     small onion
1     clove garlic
1     tbs butter
1     can of diced tomatoes
1/2  tsp sugar
1/8  tsp salt
       dash of pepper
1/4  cup fresh basil (less if using dried, I never have fresh basil)
4     boneless skinless chicken breast halves
1/3  cup seasoned fine dry bread crumbs
4     tbs grated Parmesan cheese
1/2  tsp dried oregano
1     egg beaten
2     tbs milk
3     tbs olive oil
1/4  cup shredded mozzarella cheese

I started with the sauce. cook onion and garlic in hot butter until tender. stir in tomatoes, sugar, salt, and pepper. Bring to boil. Simmer, uncovered, about 10 minutes. Stir in basil (if using dried basil add with tomatoes and other spices). set aside and keep warm.

Meanwhile. Pound chicken lightly to about 1/4 inch think in plastic wrap to keep counters clean.

Stir together bread crumbs and 3tbs of Parmesan cheese, and oregano. In another dish stir together egg and milk. Dip chicken in egg mixture then bread crumbs. (I like to dip chicken in flour before dipping it in egg to make it stick better.)

In a skillet cook chicken in hot oil for 2 to 3 minutes on each side or until done.
I decided that we needed some noodles too, so I made some fettuccine noodles. A secret I learned from "The Chew" is to cook your noodles 1 minutes less than the directions say on the package and let finish cooking in the sauce. It makes the noodles have a perfect al dente. 
Serve with extra mozzerela and parmesan cheese. 

Its delicious. Try it and tell me how you like it.

Friday, October 28, 2011

family photos

I love taking pictures in the fall, I think these turned out pretty cute with all the fall leaves!


Saturday, October 15, 2011

Creative Sister Saturday... kitchen

My little girl is going to have a birthday next month and I thought a play kitchen would be a great gift. The one I want is about $140 from Ikea.

From "Ikea"

 I really don't want to spend that much but I don't want to get a plastic one either. I decided to make one so here is the first step in my process... research.
From "I wish I had time to..."

 From "Ohdeedoh"
From "Growing a Green Family"
Most of these include items from Ikea but cost quite a bit less. So here is my plan draw out what I want keep my budget under $50 and make a sturdy fun kitchen for my daughter and future children. 

Sunday, October 9, 2011

Family Photos

I wanted to get some family pictures taken before it got to cold out. I used a timer and hoped for the best. I think they turned out ok. 


Saturday, October 1, 2011

Halloween is coming!!

With Halloween coming I thought I would share some of my past homemade costumes. 
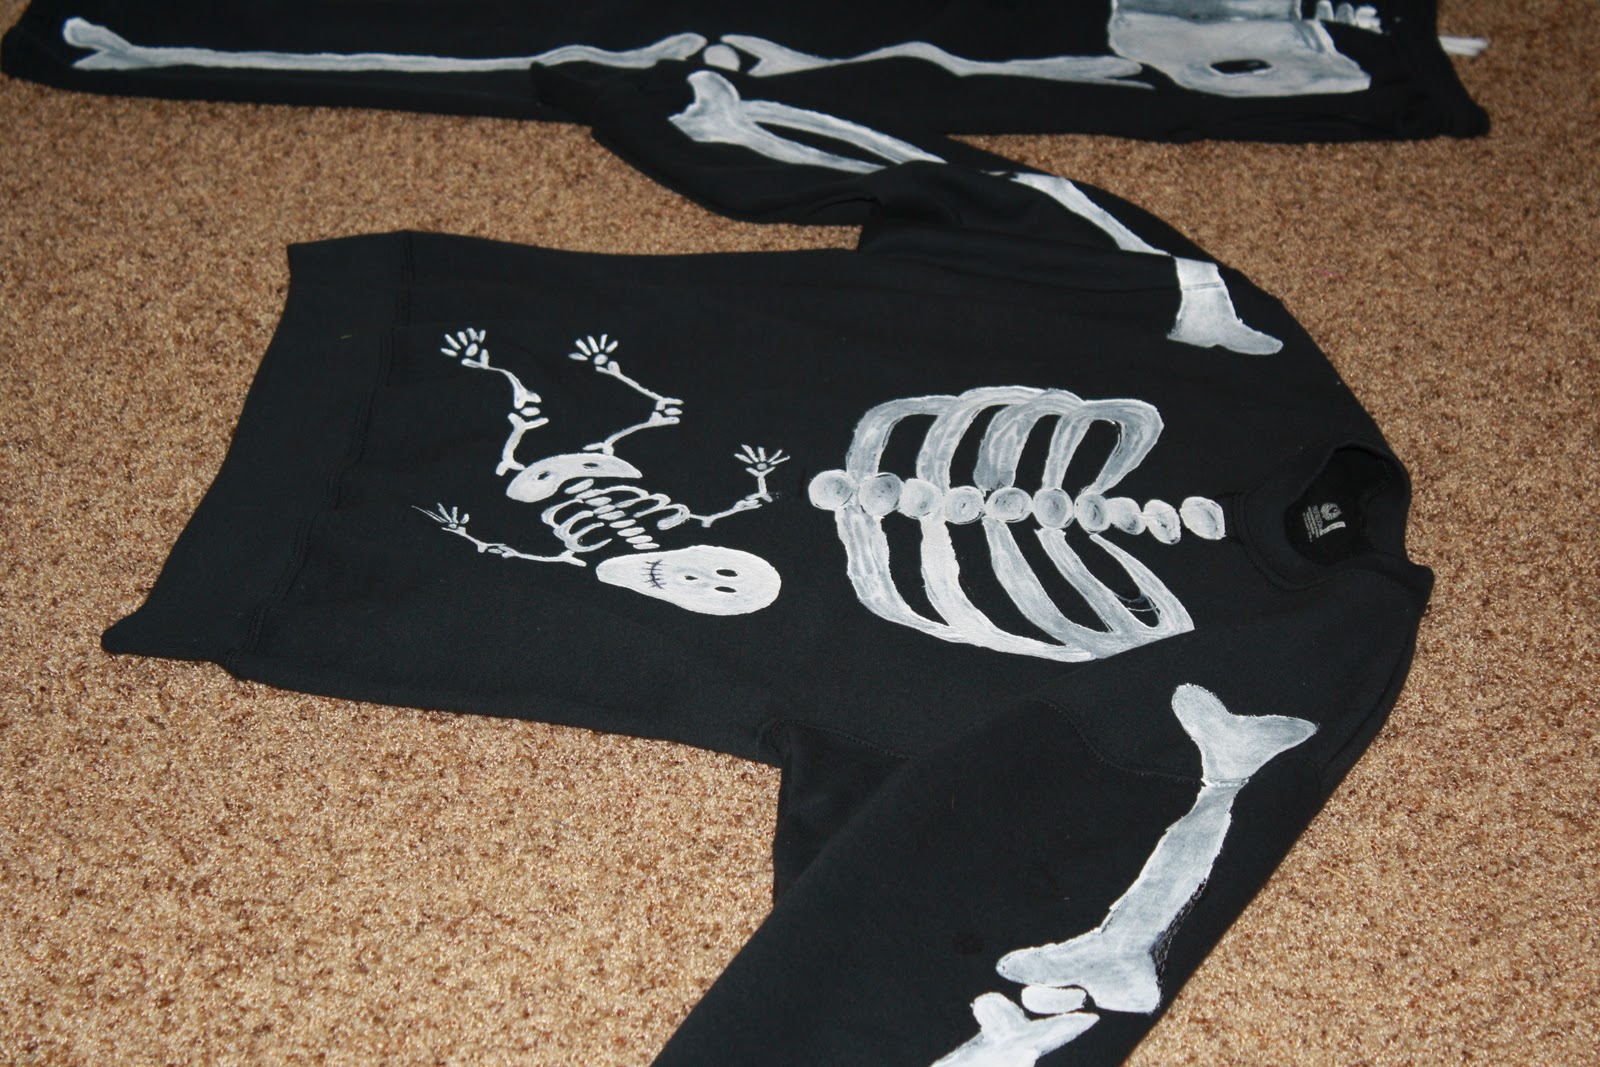
My husband and I did this two years ago. We got some black sweats and used puff paint and q-tips to draw our bones.   


I was pregnant and the time so we put a little baby skeleton in my tummy.