Thursday, June 14, 2012

Guest Craft: YW Camp Chore Chart

I am so happy that we have a guest crafter today, and just in time too. Young Women girls camps are coming up fast.
Our MOM is the guest today! She is one of the girls camp directors for the Spanish branch in her stake. She has been helping them out for several years now. She is not that new to girls camp though. I know she has been going to girls camp for her stake for 20+ years now. In our family we love to go camping. It is something we all look forward to doing all year. We've become quite good at it.
Since she has had some experience camping she knows the in and outs of getting things done and adding some fun with it. 
This year for camp she made a job chart for the girls. That way each girl will know what to help with for meals to make things run smoothly for the week. This is the awesome chart she came up with. 
 Isn't she creative?!
Each person going to camp has a bear bookmark with their name on it. She even put their initials on the bear paws. Each meal a girl has a chore. The chores are marked by an envelope that the bookmarks are placed in. Wash, start fire, help cook, rinse, dry, clear table, and free time are the jobs that need to get done.
This is such a great idea. On the back of the poster she has the descriptions of what needs to be done at each station. That way the girls will know exactly what they need to do. 
My sister and I have loved going to girls camp and it was always so great to have our mom be there with us every year. I know that the girls in mom's stake are so lucky to have her. 
Thanks for sharing your awesome idea with us.

Tuesday, June 12, 2012

Mini Scriptures

I teach a primary class of young kids for my church. A few weeks ago we had a lesson about the prophet Joseph Smith translating the gold plates into the Book of Mormon. For a cute handout I found this miniature scripture idea for the kids to take home.
My philosophy is that I get ideas for other people and then figure out how to do it on my own so that it is somewhat my own. I'll tell you how I did it.
What you will need. 
tape
glue stick
card stock
"Hershey's Treasures" candy
ribbon
print out of your scripture.
Cut the card stock so that it fits both chocolate pieces and tape them down on the paper. I think it was about 2 1/2 X 1 1/2. I'm not positive though. (I made them a while ago).
Use the glue stick to glue the small piece of ribbon to the chocolates. It should stay pretty tight but if not it's ok because you'll put your scripture on top.
Print out your scripture in a very small font into two narrow columns. You may have to work around with the document to make it work. I chose the scripture Doctrine and Covenants 3:19. Because that is where we learn that the plates of old were meant for us to read and study now.
Stick the scripture on with the glue stick and you're done. 
Not including the time I spent fiddling with the word document, this project took about an hour. Next time I do this it will be for kids who are a bit older that will appreciate the thought instead of just devouring the candy as soon as they saw it.

JUSTINE

Saturday, May 19, 2012

Baby Rees


Second attempt at new born photos. This little one belongs to me so I was able to take a lot of photos. 


This one was for my hubby!


We love our little guy!


Friday, May 18, 2012

Mothers Day 2012

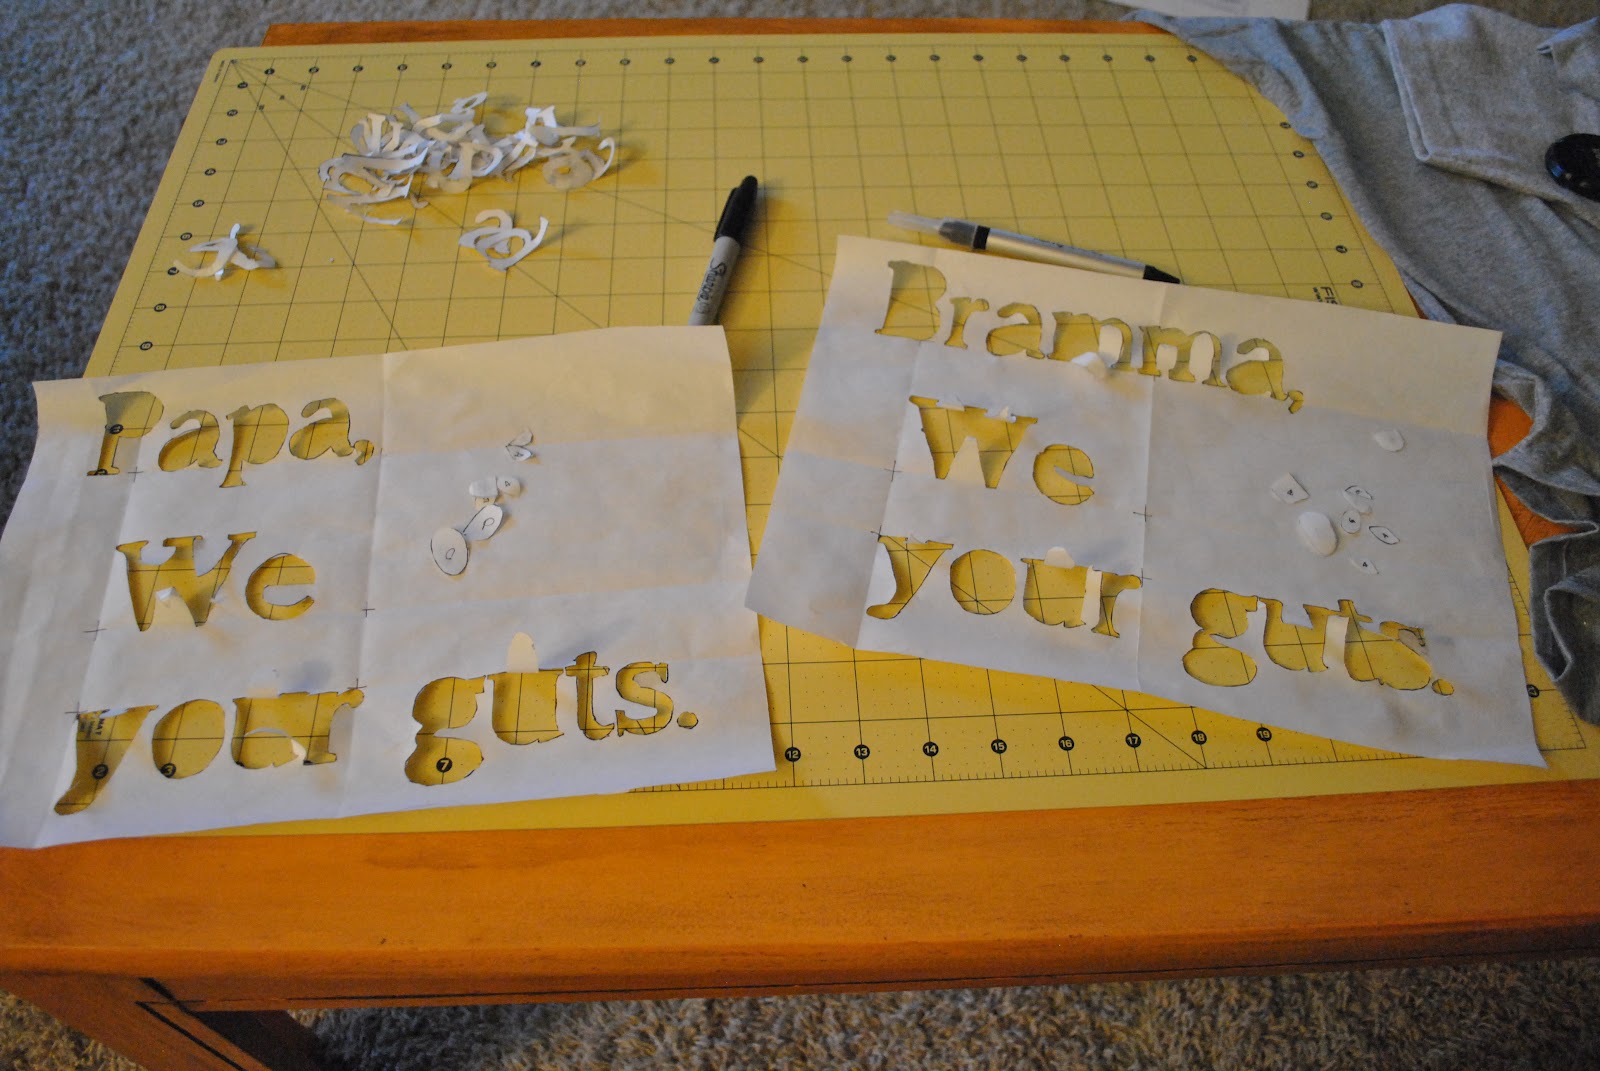
Each year for Mother's and Father's Day Makenna makes a shirt for our mom and dad. This year we decided to have all three grandkids pitch in for the shirt. The shirt usually has a hand or foot print on it with a cute little saying. While living with Grandma and Grandpa A would tell Bramma and Papa "Good Night, I love your guts" so that's what we put on our shirts.
This year to make it easy on us we used a tutorial for painting the shirts with freezer paper from this website one little minute. In case you don't want to head on over there I'll tell you how I did it here.

What you'll need:
Print out of cute font
Freezer paper (wax paper is not the same thing)
x-acto knife
t-shirt
iron
pen
paint
foam brush


Print out the saying, it doesn't have to be any special paper just printer paper will do. I chose a cute font that I liked called "A Song for Jennifer" and made it large enough for it to be seen on the shirt.
Measure your freezer paper for the shirt. I folded the paper so that the words would be lined up correctly on the shirt.


Trace the font onto the freezer paper. Line it up so that all the words line up and aren't slanted at all.

Now, use your x-acto knife to cut out the letters from the freezer paper. The x-acto knife makes it easy to cut the little spaces. Remember to keep the inside of letters such as the A, E, G and O. Tip: I used my cutting mat for this so that I didn't cut into anything I would regret later.

This is the easy part, iron. Place the freezer paper on the T and line it up where you would like the words to be. It sticks really quickly and super easy to remove when the paint has dried.
Now paint it! We used Tulip Puff paint for the saying and brushed it around with the foam brush. Make sure that all of the freezer paper is ironed securely or the paint may get under the paper.
Let the paint dry for at least an hour or until it is not sticky any longer. Pull the paper off the shirt, and there you have it.
We started with the hand prints with little J in Nebraska, then sent the shirt to Utah to finish it up with A and R's handprint. The little ones were difficult to get because didn't necessarily like to open up their fists. The paint we used for the prints was just normal craft paint.
A beautiful Mother's Day gift from the grandkids.
Past years shirts can be found at these links. Makenna is such a creative gal. Just one of the many reasons we love her.

Friday, April 13, 2012

Baby Jane

This was my first attempt at New Born photos. I really enjoyed taking them! 


She is such a good baby! I am not sure New Born Photography is my thing it requires a lot of patience but I did love taking these of my new Niece!

Saturday, March 31, 2012

Baby Shower

Last week my sweet friends through me a baby shower. It was the cutest thing ever.
We had delicious food and amazing decorations.
 My dear friend made these pom poms and the monogram for the nursery. 
The pom poms are made from tissue paper and pipe cleaners.
 We had chicken salad sandwiches, fruits and veggies (in cute vases), ice cream with any topping you can think of, and candy lots of candy (my fave!!). Everything was labeled with cards that had chalkboard paint so that they can be reused again.
 This was made with tissue paper and sticks. Super fun and simple!
 All of my amazing friends I've made since moving here to Omaha! Thanks for coming.
These two ladies are the B.E.S.T. best of all the R.E.S.T. rest! Thank you for an AMAZING day. 

Wednesday, March 21, 2012

Temple in Every Room

To you parents of young children, may I share with you some sage advice from President Spencer W. Kimball. Said he: “It would be a fine thing if … parents would have in every bedroom in their house a picture of the temple so [their children] from the time [they are] infant[s] could look at the picture every day [until] it becomes a part of [their lives]. When [they reach] the age that [they need] to make [the] very important decision [concerning going to the temple], it will have already been made.”6 


From President Thomas S. Monson's talk The Holy Temple- A Beacon to the World


We've been told to have a picture of the temple in every room in our house. We have one that I really enjoy. 


My husband and I were married in the Jordan River Temple about three and  half years ago. I was given a plaque with this metal piece of the Jordan River Temple. I liked it a lot but the wood board that it was on did not quite go with my house decor. It was purple. So I took the temple off and placed it in this frame with some scrap material I had. 
I love it because it is something that I created and I can change the background to fit any room in my house. I love to create new things plus it's great to actually have it hanging in our house.